My inspiration to return to sewing a hand-made wardrobe.
Are you considering making a wedding dress for yourself, a daughter or friend? Here is my story and experience of sewing my own wedding dress.
Becoming a first-time bride at the age of 58 was rather daunting, to say the least!
After being with my partner for some fourteen years, deciding to get married was a bit of a spur of the moment decision, made on a lovely sunny Sunday afternoon in March.
Within just a few days of running around online, we had settled on a date in July, a beautiful wedding venue, a hairdresser & make-up artist and a florist. And, just a few weeks after that, we flew home to the UK to finalise arrangements.
So it was that, on one particularly frantic afternoon in late May, I chose the flowers, had a dry run on the hair & make-up and even sampled our wedding breakfast, all within the space of four hours!
The one task I had postponed – knowing from the start that I could find nothing suitable in Morocco – was the thorny task of choosing a wedding dress.
With just a couple of days left before we were due to depart, I had only managed to make it into a single UK wedding dress shop. There, I had been curtly advised that, with just 8 weeks to go until the big day, there was now not enough time left to order a dress. I could find nothing that I liked, anyway; and I was also shocked at the cost, considering that the dress would only be worn for a few hours.
I had made my own clothes over the years, but had made very little for a long while. However, what better reason to be inspired and dust off my sewing machine than to have my own wedding looming in under two months’ time!
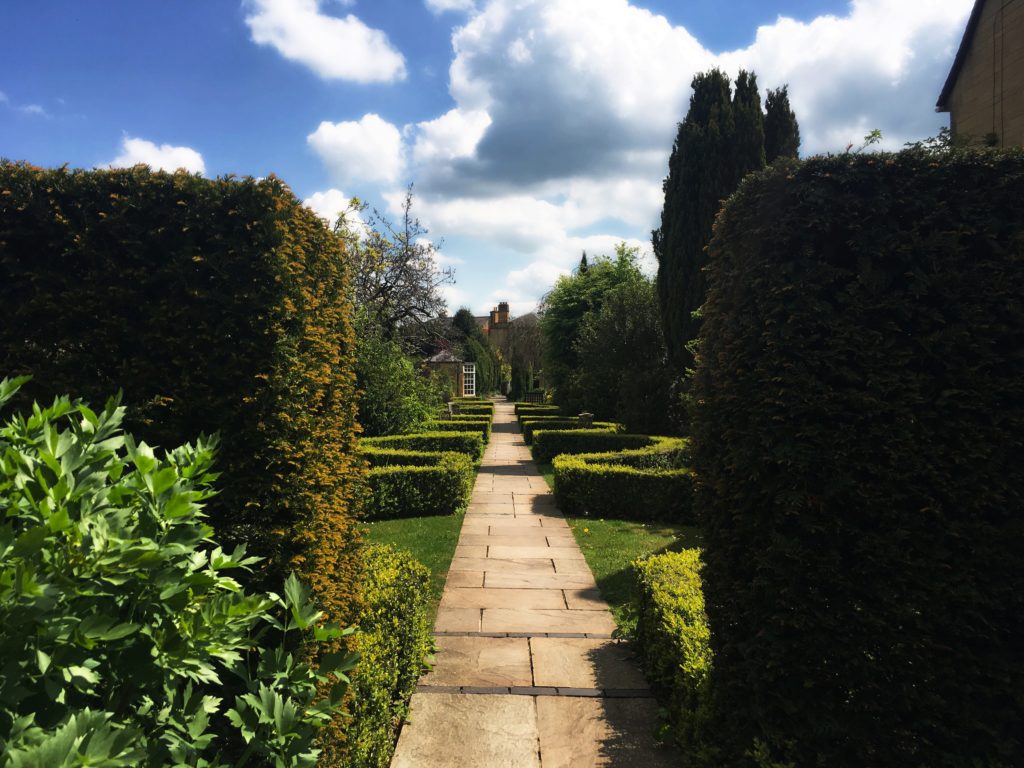
FINDING A PATTERN
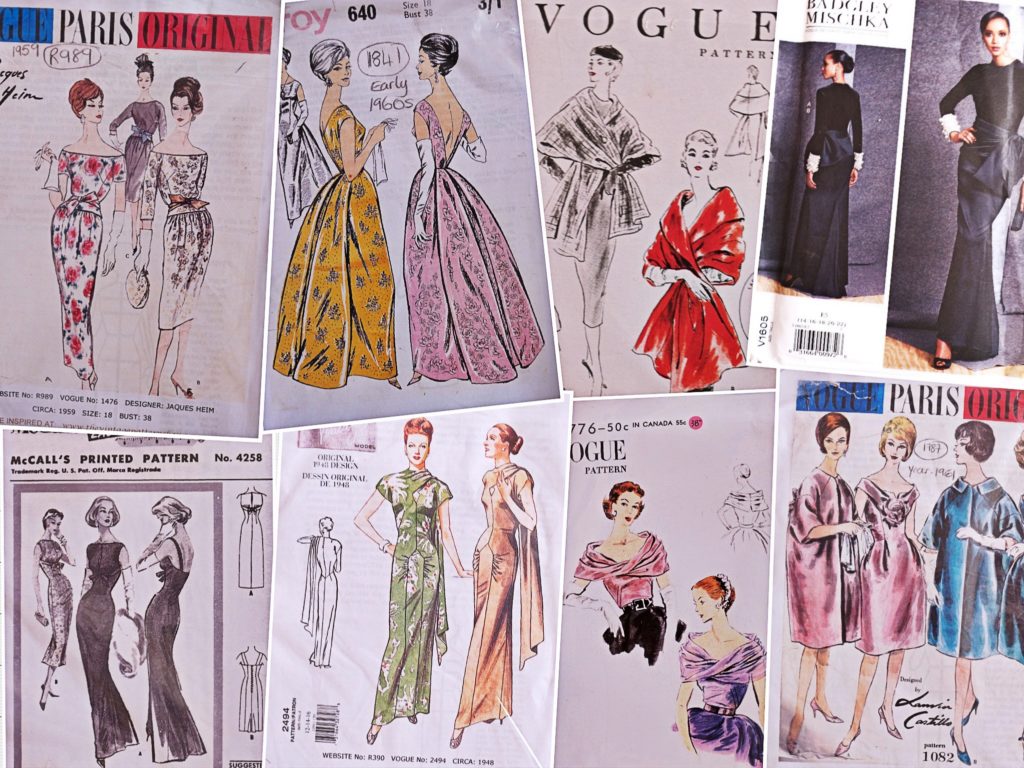
I looked at patterns online, and found myself overwhelmed as to what silhouette to go for. I had not tried on even one wedding dress, so I had no real idea of what would suit me.
I was unsure as to whether I should go for the classic bridal dress, or, as a mature bride, go for a demure dress and coat? Considering the uncertainty of the British weather, I thought the latter may be a good option. However, I was afraid of looking more like the mother of the bride, rather than the bride herself!
I ordered a selection of vintage patterns on-line (evening dress, dress & coat etc.) along with a contemporary design. Frustratingly I had ordered them in my size, but by the time they arrived I – like most brides, I guess – had lost some weight.
Just to add to the challenge of making my own wedding dress in a short space of time, I now had to adjust the whole pattern to fit me. To make matters worse, the dress that I had finally chosen to make, came without any instructions at all. My stress levels were mounting!
CHOOSING THE FABRIC
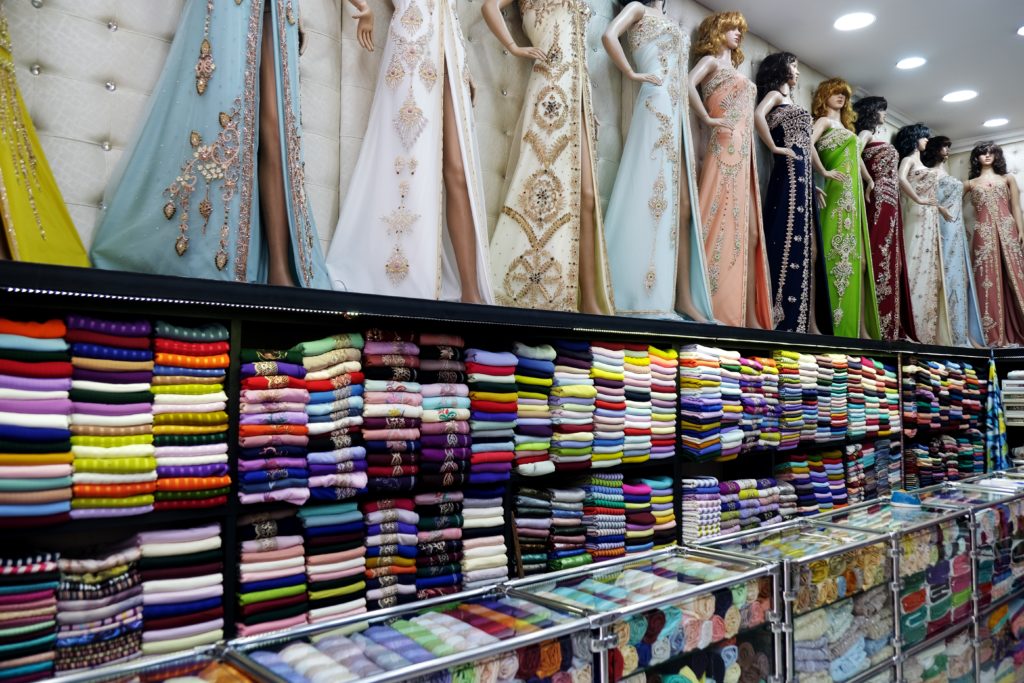
Thankfully I am surrounded by fabric shops where I live, as ladies (and gentlemen) in Morocco tend to have their caftans hand-made for them.
When it comes to the wedding season, the shops are full of elaborately embroidered and embellished fabrics. Female guests will wear an evening caftan called a Takeshita, which is made up of two or even three layers and completed with an elaborate belt.
Ladies who are getting married are expected to have at least 7-8 dresses, which are changed every hour!
I therefore had unlimited beautiful fabrics to choose from. Ironically, I ended up purchasing a completely plain heavy ivory satin that was said to be made by or for Dolce & Gabbana. I can only assume that it was end-of-line or surplus to requirements, since it was just £6.50 /$8 per metre. It was so cheap that I decided to line the dress in the same fabric to give it weight and a feeling of luxury.
THE PATTERN
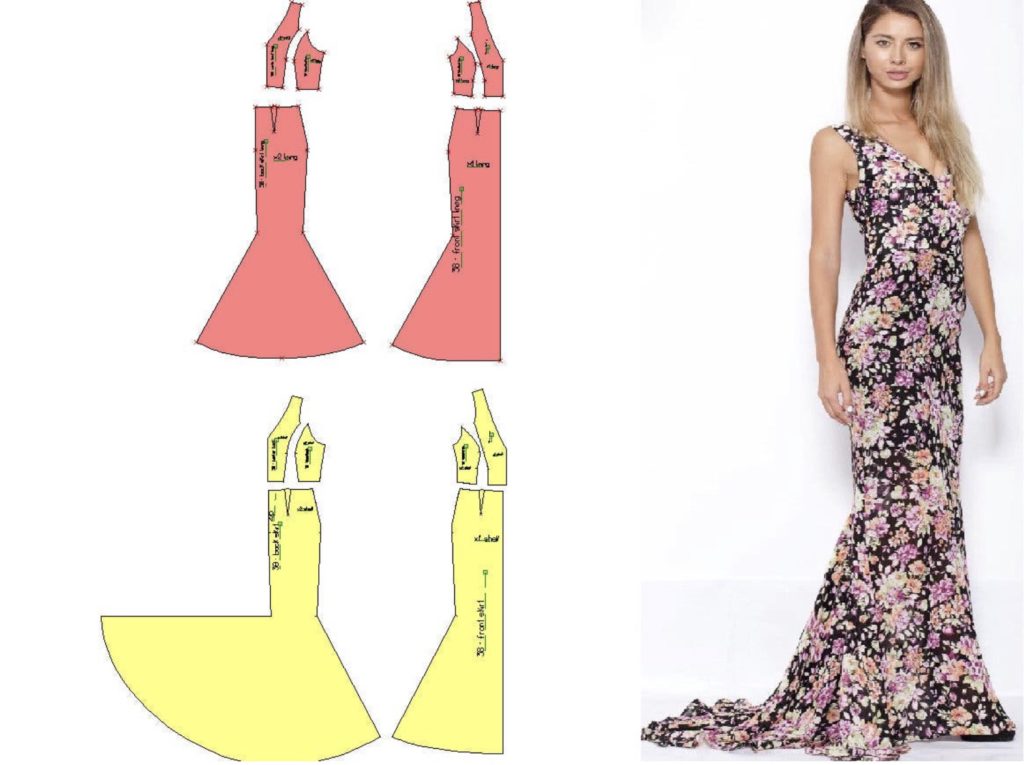
The pattern that I finally chose to make was a simple evening dress with a fish tail by JOYPATTERNS on Etsy. I was shocked and dismayed to find that her patterns come without any sewing instructions. She now notes this clearly on her page. You certainly do need some sewing experience if you order any.
MAKING THE DRESS
The dress came together relatively easily, with only a few pieces to put together as promised.
The dress was a simple bag-lined construction. The pattern pieces for the lining were virtually identical, apart from the back section which had a reduced fish tail. I machined the hemline for the lining as it would not be seen
The drama to this dress is definitely the fishtail train. Thankfully I had a friend come to visit, who could pin the hemline for me. What would I have done without her?! I rolled and sewed the hemline by hand, which was a labour of love, but so worth it.
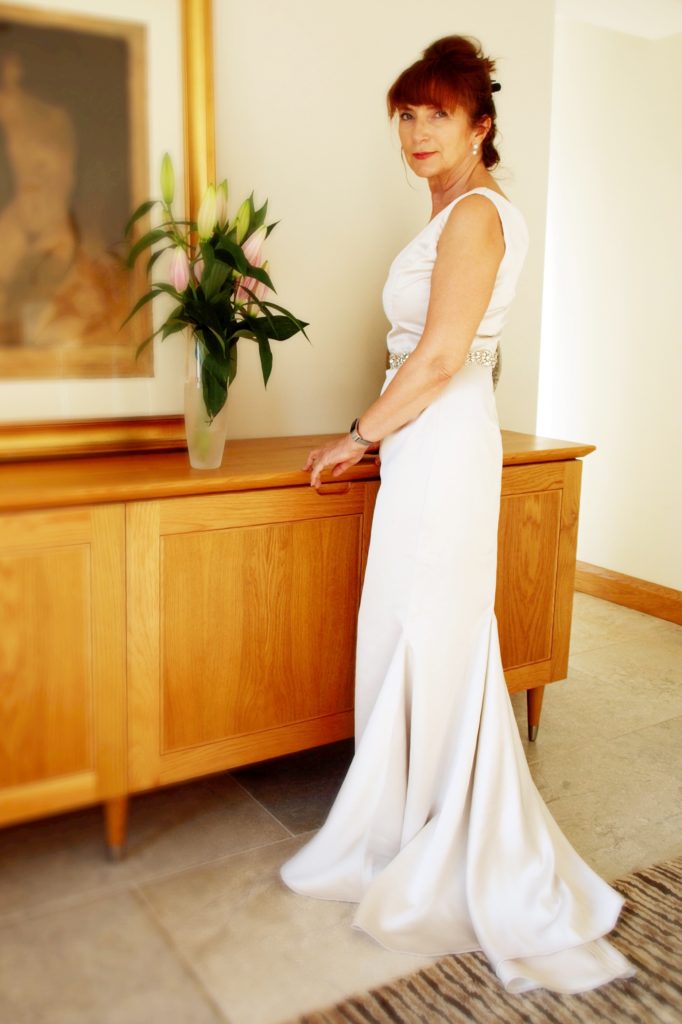
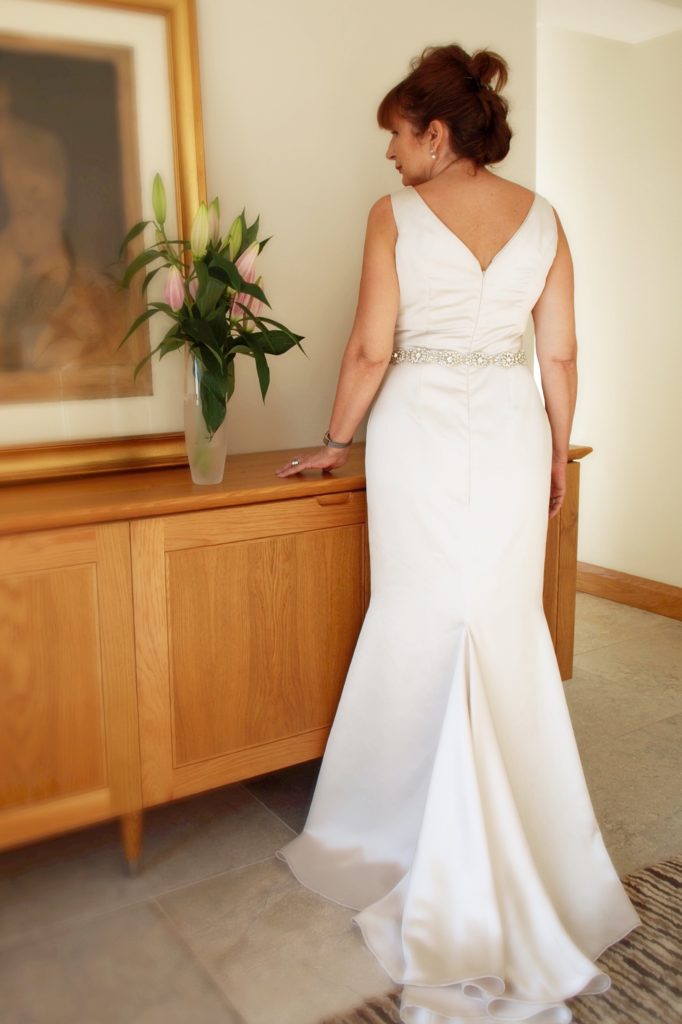
Once worn, the weight of the satin gave a wonderful drape and added sense of luxury.
Finally, I sent the dress to be dry cleaned and pressed, because it is so reasonable here in Morocco: just £2.50 / $3. It came back inside out, so I took that as a compliment to the sewing 😆
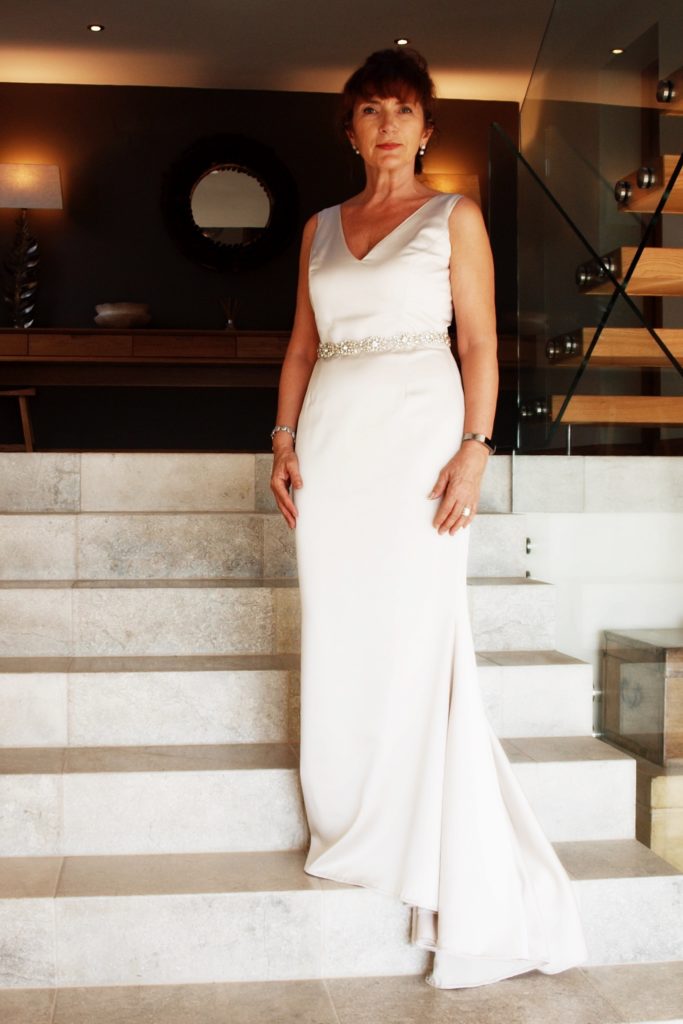
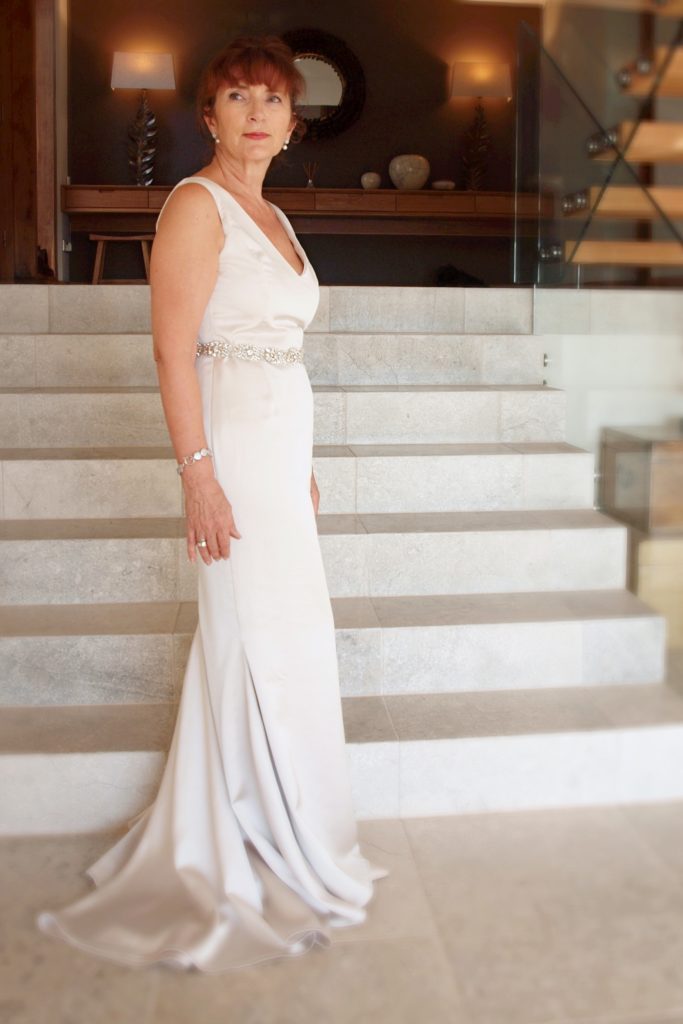
MAKING THE STOLE
These days, I am not so fond of my upper arms and so decided to add a stole to accessorise the dress.
Thankfully I already had Vogue 7161 in my pattern stash.
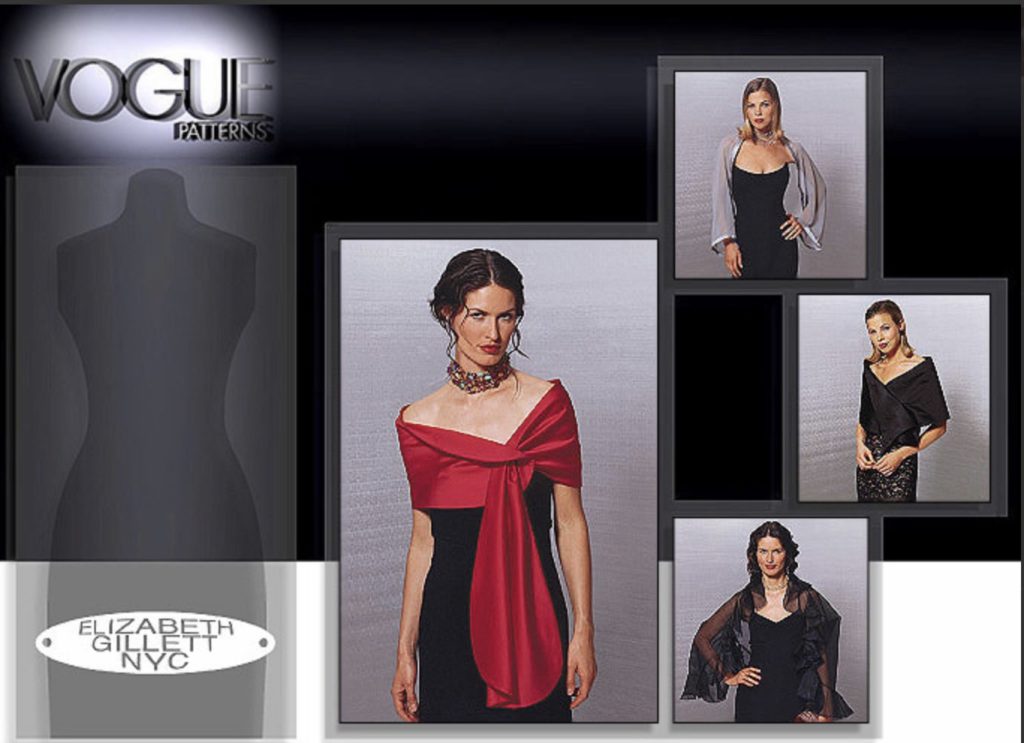
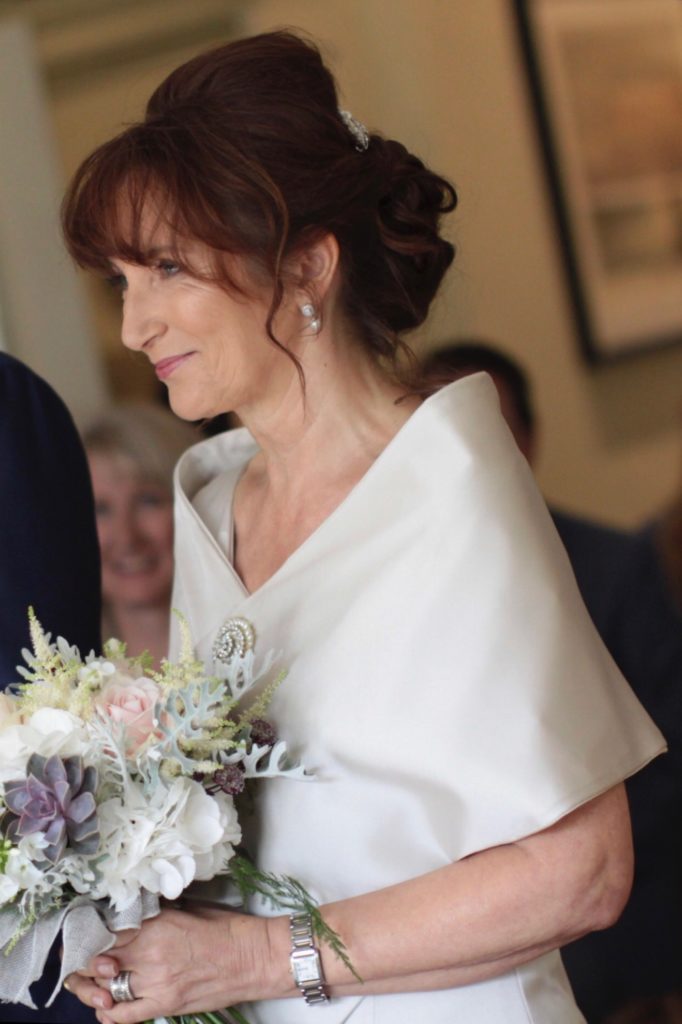
I was intending to make “view B”, but decided (on the advice of my friend) that it would cover too much of the front of the dress and intended belt. In the end, I opted to make “view A”, as it did not overwhelm the dress and would make it easier to carry a bouquet. I also felt that the understated design complemented the dress perfectly.
Ironically for such a simple pattern, I found this difficult to make!
The shawl is actually a decreasing curve, and for some reason each panel is made up of two sections, asymmetrically joined. I can only think that this is designed to save on fabric.
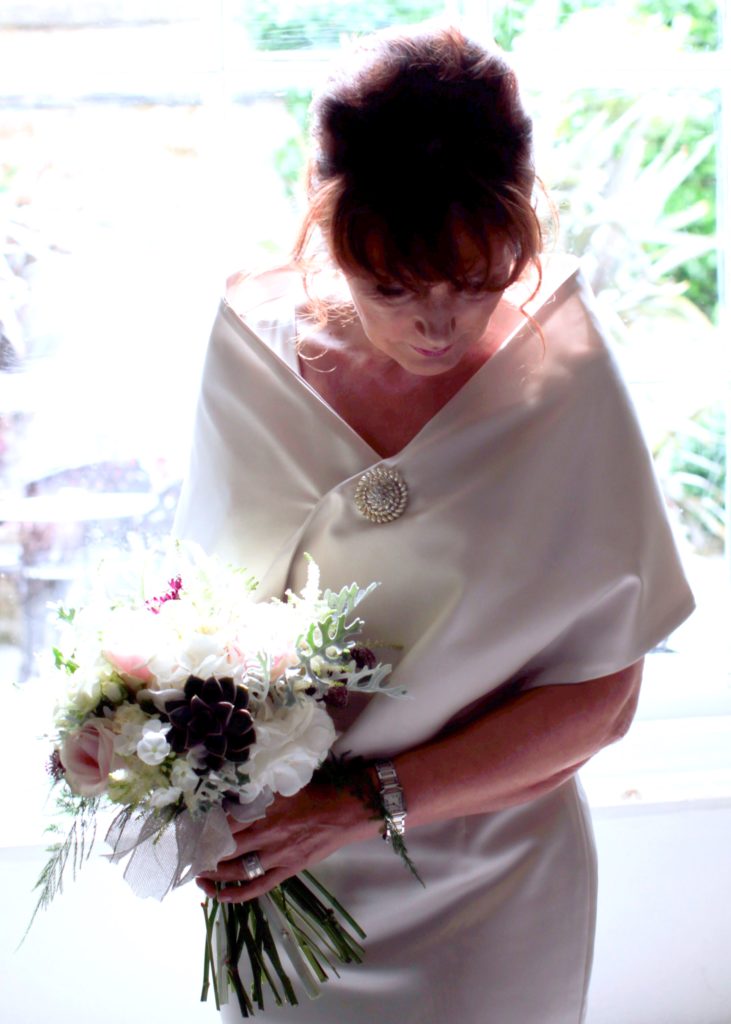
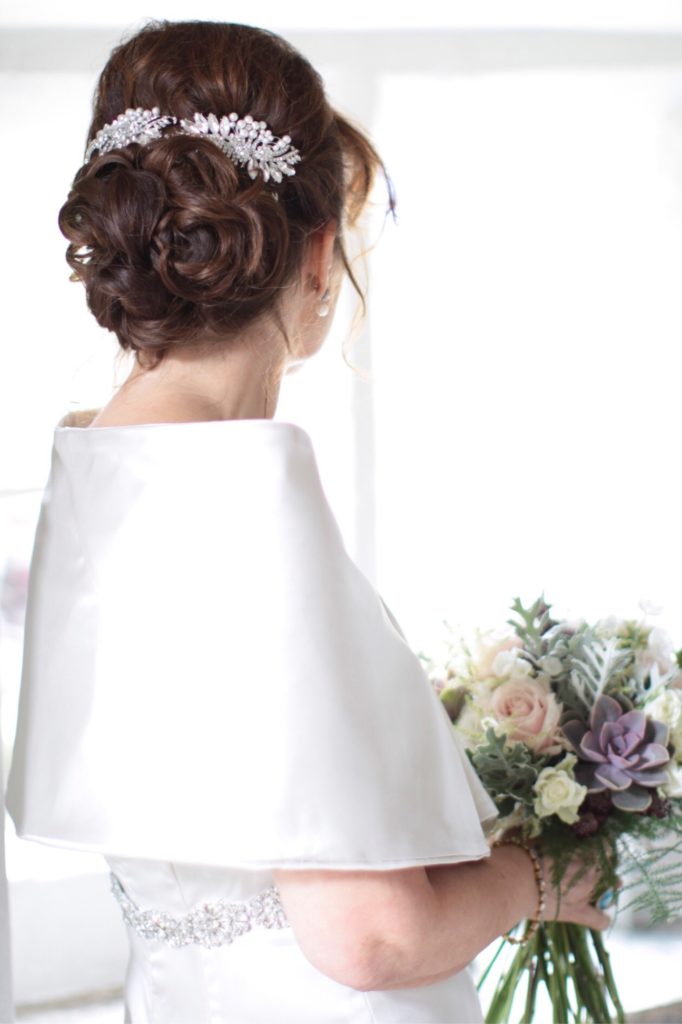
I found it extremely difficult for the seams to line-up perfectly, and also to then line-up the front and back sections to bag line. Things constantly stretched and moved. If I ever made this shawl again, I would definitely join the pattern pieces together, and cut out the fabric as one continuous piece. It would also have looked so much better as the join is clearly visible on the back when worn. Not ideal for a bride!
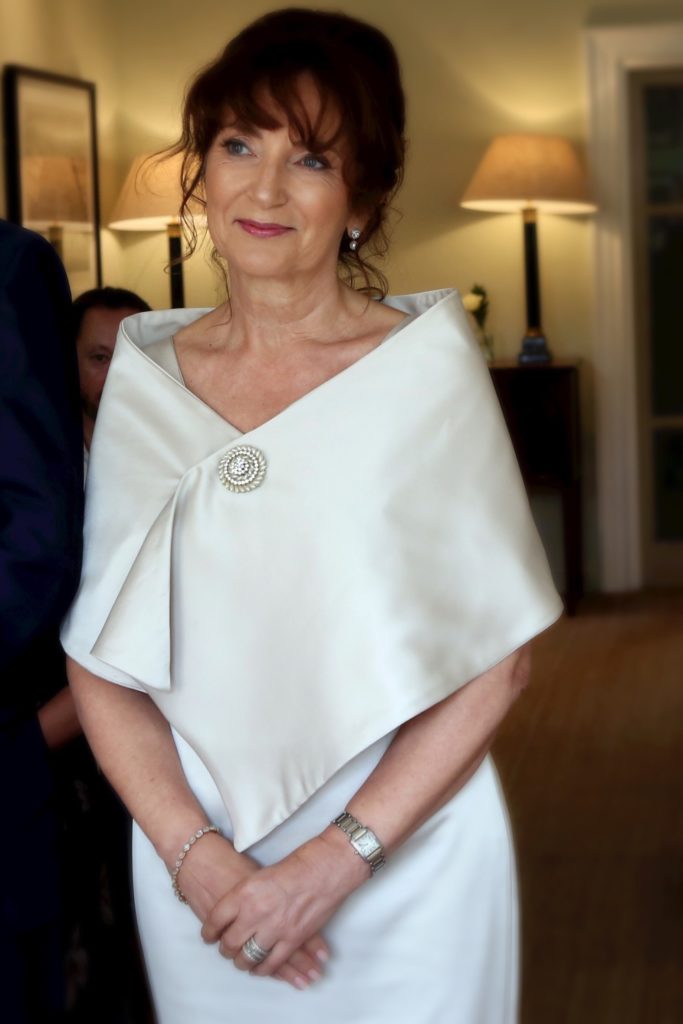
Finally, I opted-out of the button hole, as I was not sure how I wanted to wear the stole, and it did not seem to sit correctly. I chose instead to use a large press-stud, and placed a decorative button over the area where the stud was positioned. I was asked at my wedding if it was a broach from my late mother, but it was in fact just a £1.70 /$2 button from my local market.
ACCESSORIES
The dress is extremely plain, and needed a belt, so I purchased 90 cm of a Swarovski style braid for just £8 /$10 from my local fabric shop. With a couple of hooks, it was soon turned into the perfect belt.
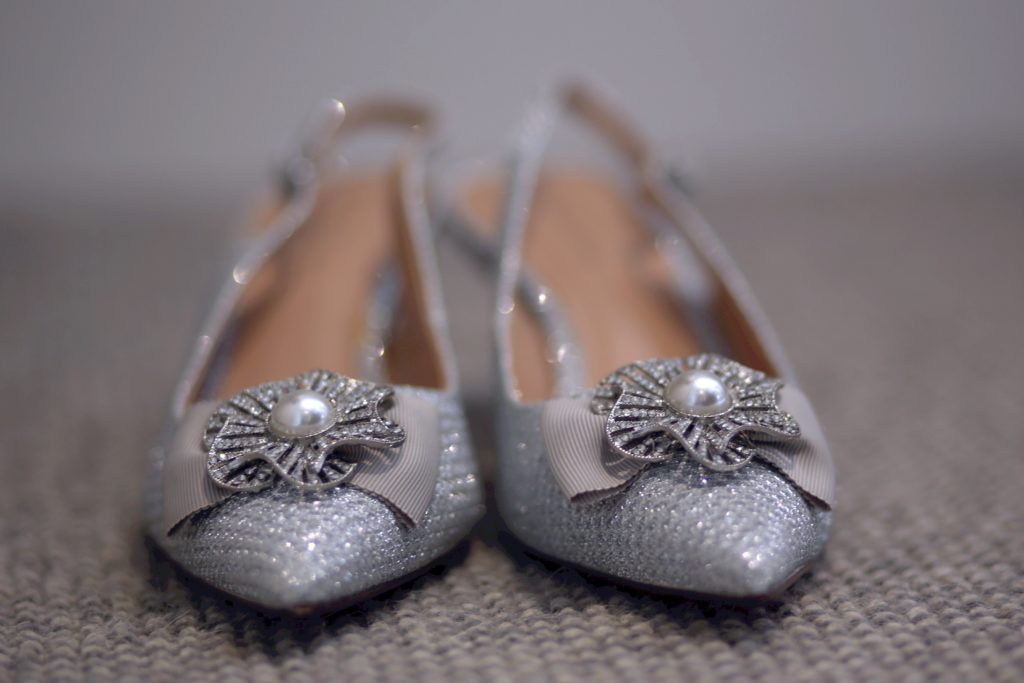
To complete the outfit, I purchased two Swarovski hair slides from Ebay for just £4; and then I lucked upon the perfect shoes in the sales by Roland Cartier a week before the wedding. They cost just £26.
CONCLUSION
I was pleased with the final result, because it had been such a risk making my own wedding dress with so little time. At the end of the day, I think that keeping it simple worked.
The dress came in at £36 / $43 to make, the stole £18 / $21 and the belt £8 / $10. The total outfit with shoes and hair accessories came to £92 / $111 complete.
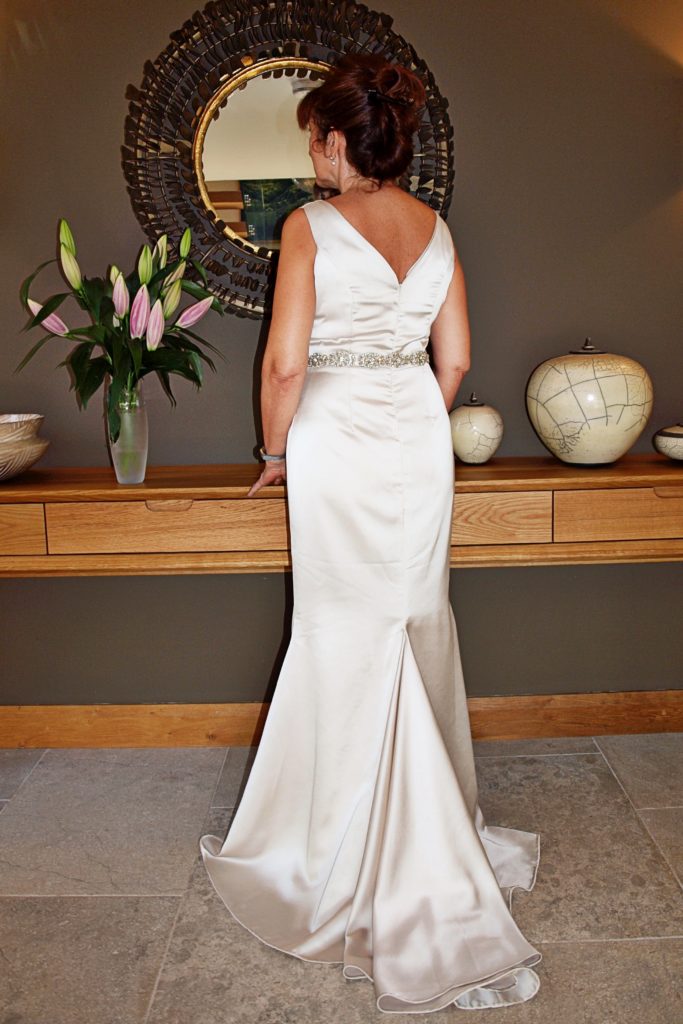
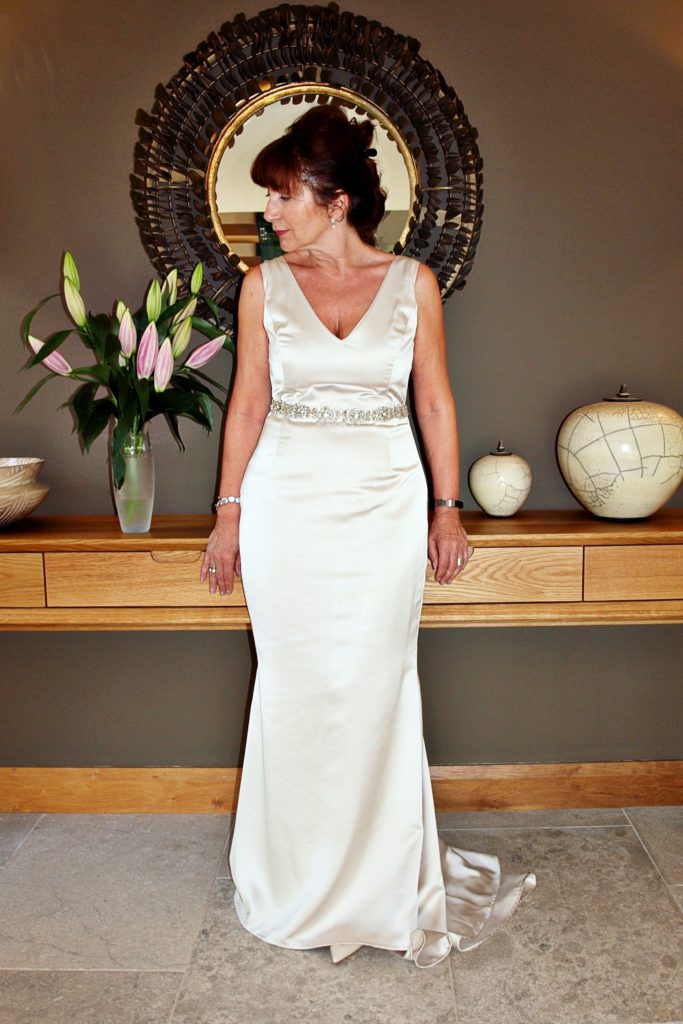
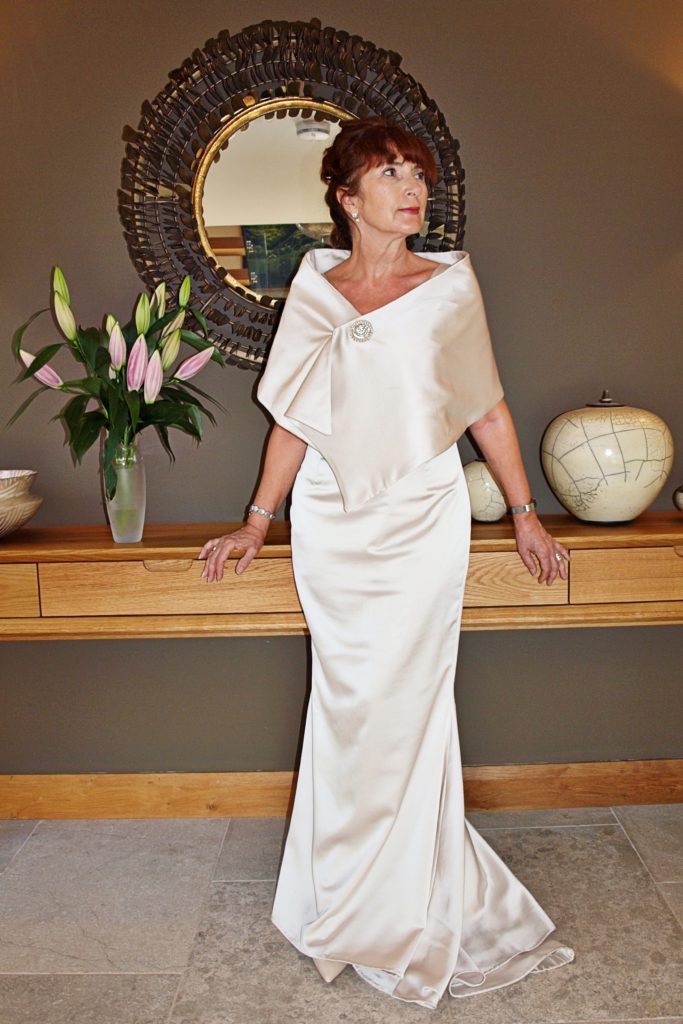
It seems bizarre to have spent so little on my wedding dress. After all, it was the biggest day of my life and I had waited so long for it. However, I felt that to spend a small fortune on a dress I would only wear for just a few hours seemed such a waste. And now my dress hangs in my wardrobe to look at whenever I feel the urge.
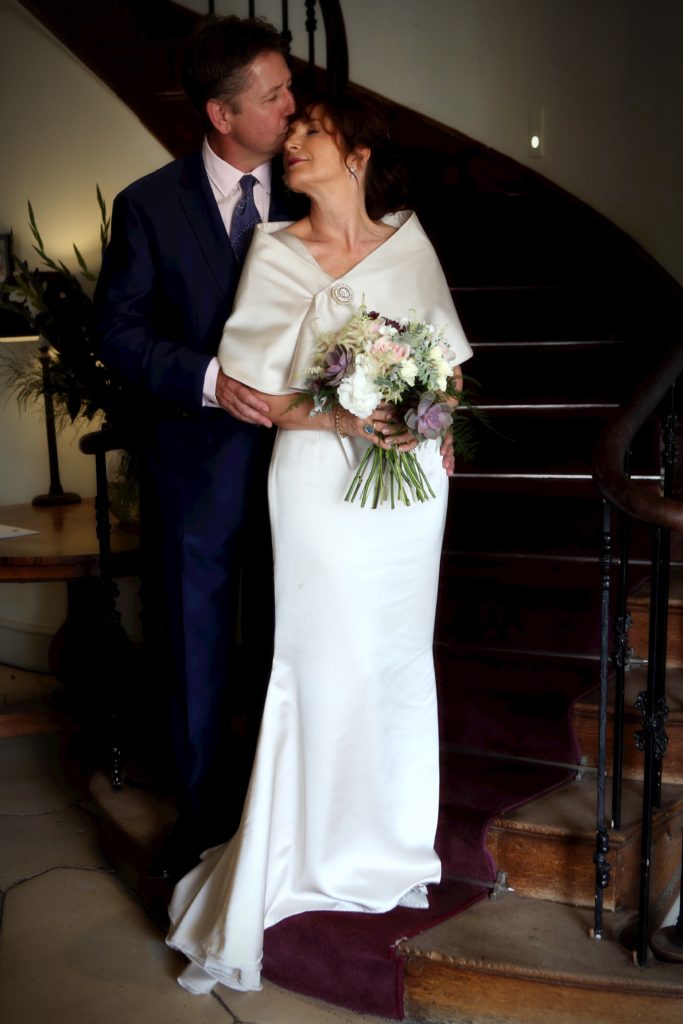
The stole and belt can, of course, be worn again over a little black dress or something similar for the evening.
And my darling husband gifted me a beautiful pair of diamond and pearl earrings, as I had saved so much on the dress. Something that I could wear and enjoy forever, and remember our wedding day whenever I do.
Thank you Kittyann, I am just waiting for the warmer weather to come to make a different version. Do buy…
Hi Judith, I have since made the jacket too in a wool tweed. It is tricky with a bulky fabric,…
Hello Joan, Thank you for your lovely comments. It is quite an easy coat to make, no complicated structures. It…
Hello Isabelle, Thank you for your kind comments, it is good to know that my tips are helpful ☺️ If…
Hi Sally, I am so sorry for the late reply, I am having issues with my spam folder! So happy…




Leave a Reply